General rules
1.
This is a fun event. Any person taking it too seriously will be
ridiculed and shunned.
2. Teams are welcome to wear racing suits, fireproof overalls,
helmets, goggles etc., but do so at the risk of being laughed at.
3. Sponsorship
logos, racing stickers and car names are encouraged but no
obscenities please.
4. Wings for
down force, spoilers, air dams and other appendages are all
permitted so long as they fit within the maximum dimensions of the
racer. They probably won’t do any good but we can all have a
good giggle at them.
5. The judges’ decision is final although bribes are greatly
received!
Masters Class Racer
This class is
for everyone that has finished 1st-3rd at any IMM since 2014. It
is for the all out honor of having the fastest international
Mini rocker cover, that isn’t attached to a Mini engine.
At each IMM, the 1st-3rd place finishers of the Modified Class
will move to the Masters Class for the following IMM. Once you are
in the Masters Class, that is where you stay for all future races,
even if you build a new racer.
At each IMM
following the class finals, the first place winner of the Masters
Class and Modified Class will compete for the IMM overall fastest
rocker cover.
The rules
are the same as the Modified Class.
Modified Class Racer
This
class is for all ages, but it can be serious, so kids under 12 are
advised to build a racer and compete in the Kids Class.
Creativity for speed and design is welcomed, but rules are rules.
The following rules are the requirements that are checked at
pre-race inspection. Other than these rules, it’s open to your
creativity and abilities.
Those that finish in the top 3 will then move up to the Masters
Class at the next IMM they race at. They will then be in that
class forever, even if they build a new racer.
1.
All ages. Kids to great great grandparents.
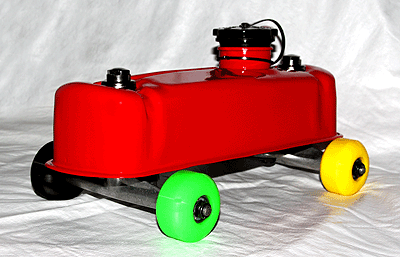
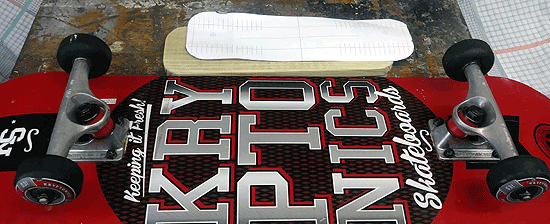
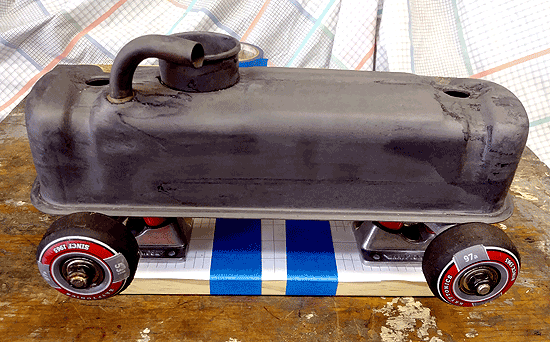
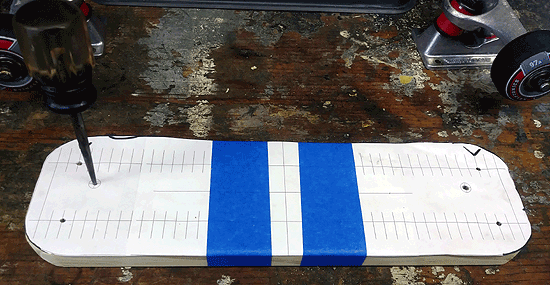
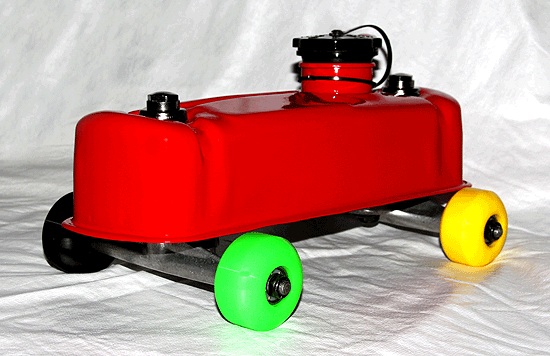
2. Body: Begin with a stock or aftermarket A series Mini rocker
cover. Modifying and decorating is open and encouraged as long as
it is still recognizable as a Mini rocker cover.
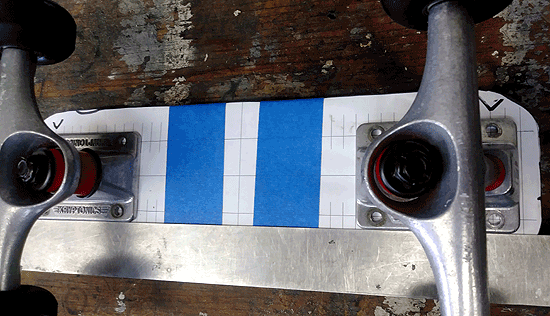
3. Wheels: 4
wheels are required and all 4 must be in contact with the track
during the race unless the racer catches air due to the track
conditions. Wheel design and material is open. Maximum wheel
diameter is 5 inches.
4. Wheel
bearings: Open. Lubricants are open.
5. Axles: Open.
6. Gravity is
the only power source. There can not be anything mechanical that
would affect the speed.
7. Maximum dimensions and weight:
Length – 14 inches (35.56 cm)
Width – 8 inches (20.32 cm)
Height – 8 inches (20.32 cm)
Weight – 8 pounds (3.628 kg)
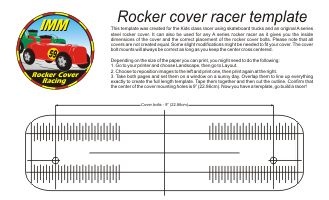
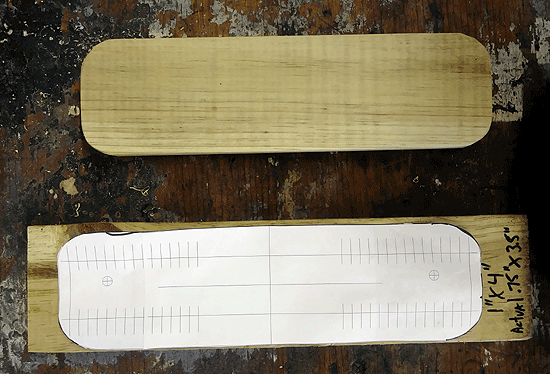
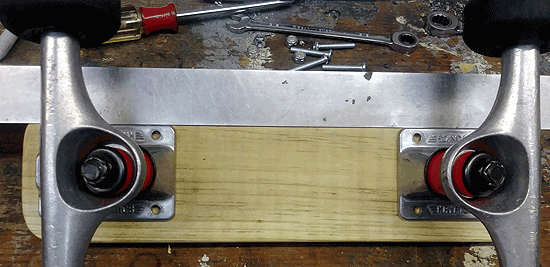
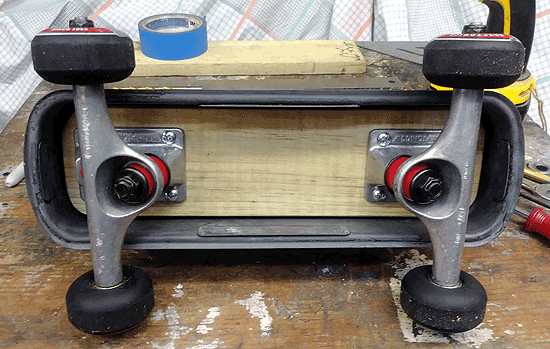
Kid's Class Racer
This
class is designed for kids to learn how to build a racer, be
creative, and have fun racing other kids. The rules were created
to keep all of the racers closely competitive while allowing the
kids to be the builders with minimal adult help. The following
rules are the requirements that are checked at pre-race
inspection. If the racer looks to have too much adult involvement
or does not meet the following rules, it is up to the judges to
move the racer to the Modified Class for consideration. Note,
the rules are as basic as putting a rocker cover on top of a very
small skateboard. The extent of the rules is to keep it that basic
and equal. See the instructions and use the template below to
make it even easier.
1.
Age: 12 and under at the time of the race.
2. Tools: No
tools beyond standard hand tools, saws, and drills can be used. No
welding or machining.
3. Body: Begin
with a stock type steel A series Mini rocker cover. Modifying and
decorating is open and encouraged as long as it is still
recognizable as a Mini rocker cover.
4. Wheels: 4
stock skateboard or roller skate wheels made of urethane or
rubber. Maximum diameter 2 ½” (65 mm). Minimum width 1.18”
(30 mm). The wheels can not be modified or worn to reduce the
width touching the track surface. All 4 wheels must touch the
track during the race unless the racer catches air due to the
track conditions.
5. Wheel
bearings: Steel ball bearings only. If the bearings are in
question, be prepared to remove the dust covers to show them for
inspection. Lubricants are open.
6. Axles: Stock
skateboard or roller skate trucks. The only modification allowed
would be to do what is needed to lock the truck from moving, if so
desired.
7. Gravity is
the only power source. There can not be anything mechanical that
would affect the speed.
8. Maximum dimensions and weight:
Length – 14 inches (35.56 cm)
Width – 8 inches (20.32 cm)
Height – 8 inches (20.32 cm)
Weight – 7 pounds (3.175 kg)
The Race
1. There will be heats of 2 Racers per heat with the best of 3
races deciding the heat winner.
2. The first Racer to cross the finish line is the winner unless
the track is equipped with lane digital timers that precisely
measure the equal distance. Then the fastest time wins. If
neither Racer makes it to the finish, the one going the furthest
distance wins that race.
3. Any Racer crossing a lane marker shall lose that race
4. Winning Racers will advance to the next round until all are
eliminated except one, which becomes the outright winner.
5. Following the finals, there will be one race (best of 3 races)
between the winner of the Modified Class and the Masters Class for
the honor of being the fastest overall!
6. Any protest must be lodged with the judges who will remind you
of General Rule #1.
|